
Use this buttery delicious dinner rolls in the air-fryer recipe when you want to bake just for two people. Or just for yourself. Trust me you wouldn’t find any other method that is easier and quicker than this. Except you buy them. But we all know how good the homemade dinner rolls taste right?
I only have two people in my home and it’s such a waste to make a whole tray of dinner rolls for just two of us. Especially when it’s a holiday and when I know I’m gonna have tons of leftovers from all the food I make. I wouldn’t mind having a tray full of dinner rolls for leftovers but it’s not helping when you want to cut down some holiday calories. Oh man these dinner rolls are irresistible. It’s a good thing that I don’t make a lot.
But what if you need to make more? well, this is the portioned-down version of my original dinner rolls recipe which I created to mix in my Kitchenaid and bake in the oven. So If you have a big family, you can easily double it, triple it, no problem, it works wonderfully.
Kneading the dough
As I said, this dinner rolls recipe is originally created to knead in the mixer. But when you make a small batch, most of the mixes are unusable and do a poor job at kneading. So I chose hand kneading. But if you haven’t worked with sticky dough then this could be tricky. a little. But totally doable even for a beginner. You just have to trust the process.
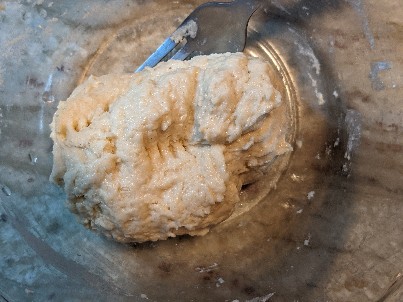
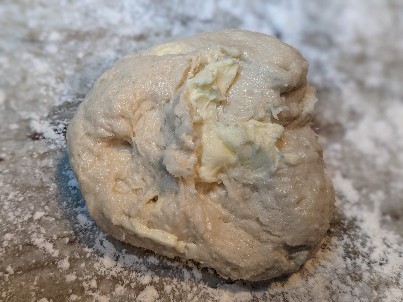
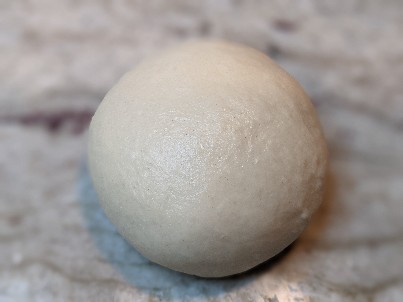
When you mix the dough (before adding butter) you’d notice that it comes together nicely and make a sticky but a good dough ball. And then as soon as you add softened butter and start kneading, your dough is going to break apart and start to become very sticky. If you’re not familiar with this you’d think what the heck I did to my dough. (That was my exact thoughts when I first made this type of bread by hand) You’ll probably be very tempted to add some flour. But please do not add any flour.
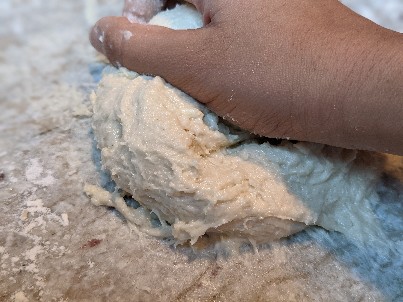
It would feel like it’s taking forever for the dough to form but I promise you it’s going to come together as your gluten forms and your butter incorporates. Definitely use a bench scraper to scrape the dough when it sticks to your hand and to the counter and knead again. The slap and fold method works great when you hand knead these kinds of doughs.
Why you add butter later to the dough?
Butter is mostly fat. And when you add fat to the dough it coats the proteins in the flour which forms gluten. When there isn’t enough gluten in a bread that makes the bread very dense. And it also inhibits or slows down water absorption. That’s why you have to hydrate the flour first so the gluten formation process starts.

A few tips you’re going to need
- Use a new packet of yeast and check for the expiration date. they go bad really quickly when exposed to air. If you use a jar then keep the jar in the freezer.
- Your water and milk should not be hot. It should be warm enough that you can dip your finger in it comfortably. I usually heat mine in microvawe for about 10 – 15 seconds and then check how warm it is. You don’t have to activate yeast if you use instant dry yeast but I always recommend adding yeast to warm water/milk and see if it forms up immediately to see if the yeast is still good.
- Knead until the dough is very elastic and is shiny and smooth. And covering it while it’s proofing is important to prevent it from drying out from the top and make a skin.
- Lining the air-fryer with a piece of parchment makes it easier to clean. Do not use a very big piece. It has to be just enough to cover the bottom of the basket.
- Air fryers are different from brand to brand. Some air-fryers aren’t calibrated well. So when you air-fry/bake your buns you may have to adjust the time accordingly. For bigger air fryers you may have to air-fry your dinner rolls for about a minute longer since larger air-fryers take a little bit longer to heat up.
- Do not egg wash. Eggwashing ensures that you have a nice and shiny skin on the top. But in the air-fryer that happens too quickly and it can get too dark by the time your dinner rolls are done. So in this case, milk is a better option. It also keep the skin moist which helps in obtaining a higher rise in bread rolls.
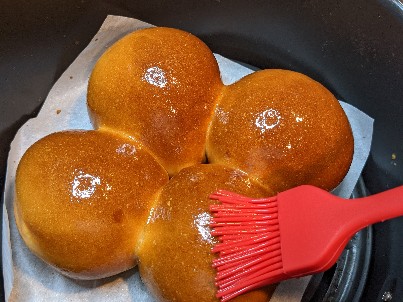
- Definetly apply some butter as soon as you took the bread rolls out. It hydrates the dried out skin and make it really soft. Also gives a beautiful shine to the bread rolls.
How to serve
Serve these air-fried dinner rolls fresh and warm with butter. If you’re not having them right away then cover with a tea towel and it would keep the bread moist for a few hours. To reheat, wrap them with foil and heat in the air-fryer for a few minutes on medium-low heat.
Amazon affiliate links for the products I use:
Hope you enjoy my Dinner rolls in the air-fryer recipe, it is the perfect amount for just two people. Give it a try next time you want to make a small batch of buttery soft dinner rolls.
More Air Fryer Recipes and articles you might like:
Read this before you buy an air-fryer
Air fried tandoori chicken bites
Salad with air-fried eggplants


Dinner rolls for two in Air-Fryer
Description
Super soft and buttery dinner rolls made easy in the air-fryer with just 15 mins of cooking time. The perfect recipe for two people.
Ingredients
For the dough
Other
Instructions
Make the dough
-
Into a bowl add lukewarm milk and lukewarm water. Sprinkle your rapid-rise yeast on the top. They should start to make foam around the edges within seconds. (if not your yeast might be expired. Start with a fresh packet of yeast)
-
Add flour, sugar, salt to the bowl and mix well with a fork. Then using your hands make it into a rough ball. There shouldn't be any loose flour in the bowl.
-
Transfer the dough ball onto a floured surface. Add softened butter and start kneading the dough.
-
The dough would be very sticky at the beginning. Do not add any excess flour. It would come together as you knead it. Use a bench scraper to scrape the dough from the bench and from your hands when it sticks and then keep kneading. (please refer to the "kneading the dough" section in the description for more details)
-
Knead about 10 - 15 mins. You should get a shiny elasticky dough when it's properly kneaded. The dough should be tacky but not overly sticky.
-
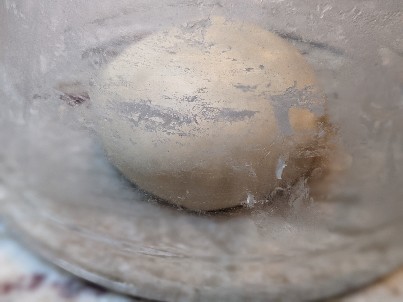
Cover with the bowl or plastic wrap and let it proof until it's doubled in size. (This would take roughly about 30 - 45 min depending on room temperature)
-
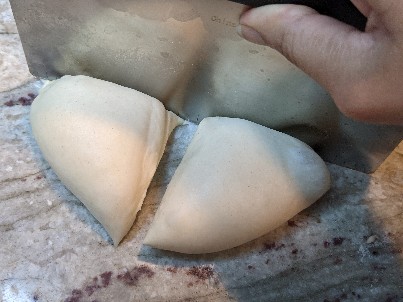
Degas the dough by punching it down. Cut the dough into 4 equal pieces.
-
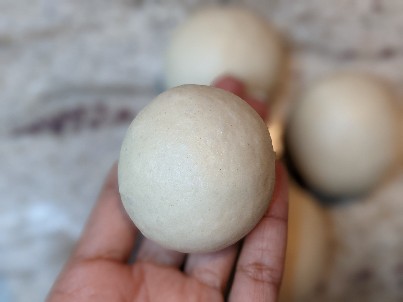
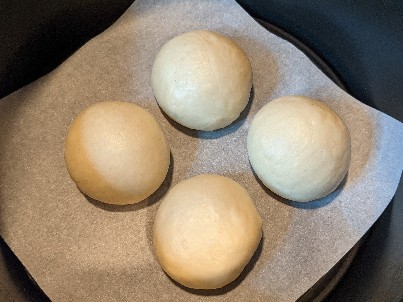
shape each dough piece into a dough ball that has a smooth surface on the top.
-
Place them on the air-fryer basket which has lined with parchment paper. Keep them about 1/2 inch - 1inch apart from each other.
-
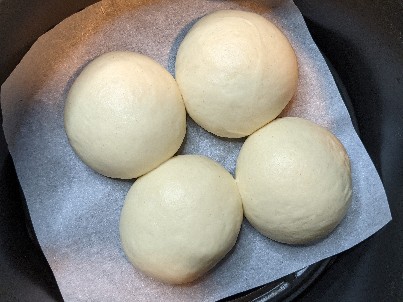
Insert the basket into the air-fryer OR cover it with plastic wrap to keep them from drying out. Do not turn on the air-fryer. Let them proof again until they're doubled in size. This would take roughly about 30 mins.
-
When they are doubled in size, brush them with some milk.

-
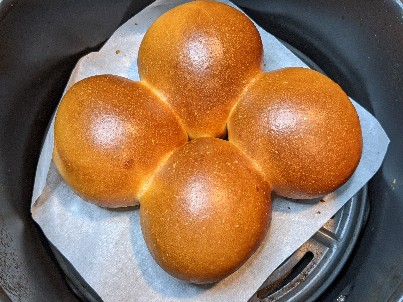
Set the air-fryer for 315 F (160 C) and bake/air-fry for 14 - 16 mins until they're baked completely and the top is nice and brown.
-
Immediately brush them with melted butter. Cover with a tea towel and let the dinner rolls cool down for about 5 mins. This would make the top of the bread very soft and moist. Enjoy fresh and warm.
Leave a Comment