
The easiest Pakki style Chicken Dum Biryani recipe made with store-bought Biryani masala powder. Super delicious. I promise you’d definitely think twice when you order Biryani from a restaurant next time.
There are thousands of different biryani varieties out there. But in my opinion, nothing can beat Hyderabadi chicken dum biryani. “Dum” means cooked with steam. All the dum biryanis fall into two different categories. One is kacchi and the other is pakki. Kacchi means “raw” and Pakki means “cooked”. In Kacchi Biryani, you marinate the meat for a very long period of time and then layer with half cooked rice and cook with steam (aka Dum). In Pakki style, you cook meat and rice separately and then layer and cook again in a Dum.
Kacchi vs Pakki styles
There are a few cons and pros to both of these methods. The kacchi (raw) style definitely takes longer to make. You need at least 12hours of meat marination and then you need to cook it with steam for longer until the meat is cooked. But the hands-on time is very short since you cook it only once. And I can guarantee that you’re going to have melt-in-your-mouth tender meat at the end because of the longer marination in yogurt. The yogurt helps to breakdown the proteins and make the meat super moist and tender. Please refer to my Kacchi style chicken dum biryani recipe. So whenever I have time to prepare ahead of time, this is the biryani I always go for. The cons are, this method is a little tricky. if you didn’t cook it enough, you can end up with raw meat. And if you cook in high heat, you can burn the chicken and masalas on the bottom.
On the other hand, Pakki style chicken dum biryani recipe is my favorite to make in a hurry. Let’s say I just got to know that my friends are going to visit for dinner, and I want to make Biryani, then this is the recipe I always go for. In Pakki method, you cook the meat as you cook a curry. And you make your rice in a different vessel at the same time. Then you layer your cooked meat and rice and cook in dum again. What I love about this method is, you can always taste the curry and adjust the seasoning, spices as you make it. And you definitely know that your meat is cooked. So it’s fool-proof. But your hands-on time is longer since you cook the curry too. Also, your meat wouldn’t turn out to be as tender as your kacchi style meat. (trust me it’s still tender and delicious).
If you want to try the Kacchi method, visit my kacchi style chicken biryani recipe for the most simplified and detailed recipe.
Important info:
- For this pakki style chicken dum biryani, I use store-bought masala for the convenience. The brand I’m using is called “Shan” and I’m using their “Bombay biryani masala” (not sponsored). You can use any other biryani masala that is available in your grocery stores.
- I do not use whole spices for the curry since they’re included in the biryani masala packet I use. But if your biryani masala doesn’t have them, add 1/8 tsp of cumin seeds, 3 cloves, 3 cardamoms, a piece of cinnamon, 1 star anise when you fry the onions.
- I also add some Kashmiri red chili powder for the color of the biryani and cayenne for heat. You can substitute with any other red chili powder or skip if you don’t want heat.
- The chicken needs to cook longer in the curry to get them tender. So don’t do that in a hurry. Cook the curry in low flame for a longer time.
- Turn off the heat when you add your yogurt. When yogurt heats up the protein in it curdles and starts to separate. So make sure you turn off the heat when you add your yogurt, mix with your chicken, and then turn the heat to medium-low when you cook.
- Also use room temp, full-fat yogurt if possible. The sudden heat difference and the lower fat content can also make the yogurt to curdle.
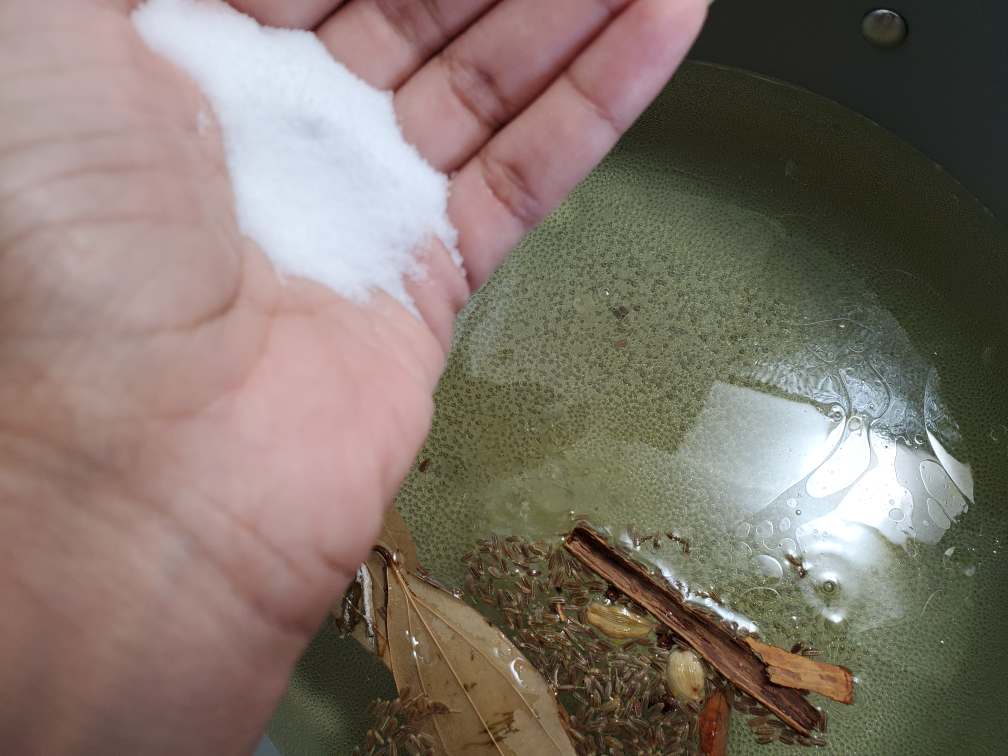
- When you cook rice, it’s very important that you salt the water properly. Most of the time, the culprit of bland biryani is under-salting. Taste the water your boil your rice with. It should taste pretty salty. (for your reference: for about 3l of water I add about two palms salt. Of course, this depends on how salty your salt is)
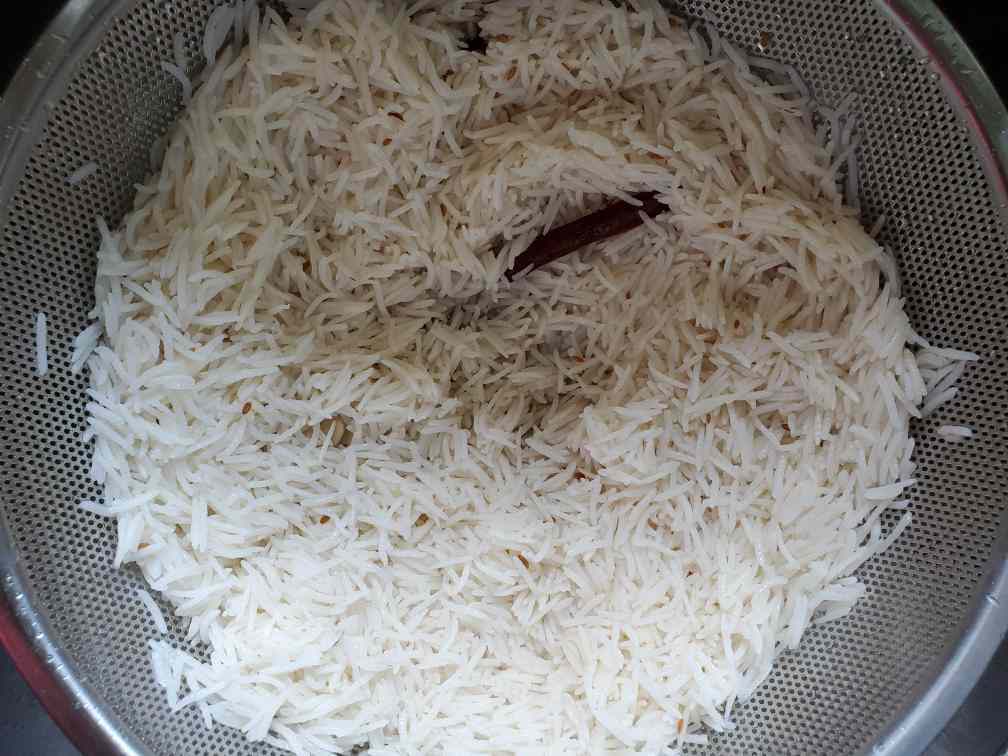
- cook the rice until they’re about 90%. I know this doesn’t make sense. What you’re aiming for is almost cooked rice. I usually take a rice grain out and bite it to test the doneness. You should feel that the rice grains are cooked all the way through (no white raw starch in the middle) but firm and need a bit more cooking. Do not wait until they get mushy. Drain the rice immediately and spread them around the colander to stop them from further cooking.
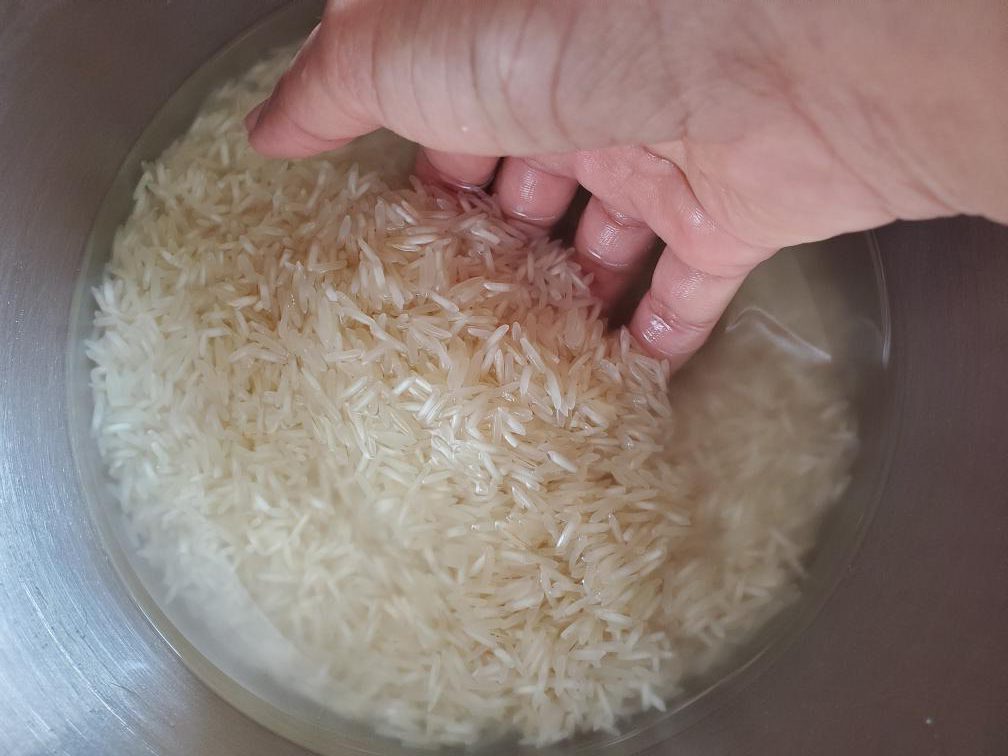
- Use good quality basmati rice. And wash the rice thoroughly until water runs clear to remove all the starch. Otherwise starch would become gummy and rice grains would stick together.
- Soak the rice before you cook. This helps the rice to cook faster and to cook all the grains thoroughly.
- You can make the curry ahead of time. Then later you can cook the rice, layer, and steam it before you serve. Or you can also layer the chicken and rice in a baking tray, cover with an aluminum foil and bake it a 350F preheated oven for about 30 – 40mins.
Serving options:
Serve with onion or cucumber raita and hard-boiled eggs. Use fried onion, fresh cilantro, and mint to garnish the biryani.
Some items that are mentioned in the recipe (Affiliate Links):


Chicken Dum Biryani (Pakki style)
Description
Try my fool-proof pakki style Hydrabadi Dum Biryani. Best biryani recipe when you're in a hurry. The chicken curry cooked separately and layered with aromatic basmati rice and then steamed for perfection. Photos included for each and every step.
Ingredients
To make the chicken
For the rice
Layering and Garnishing
Instructions
Make the chicken
-
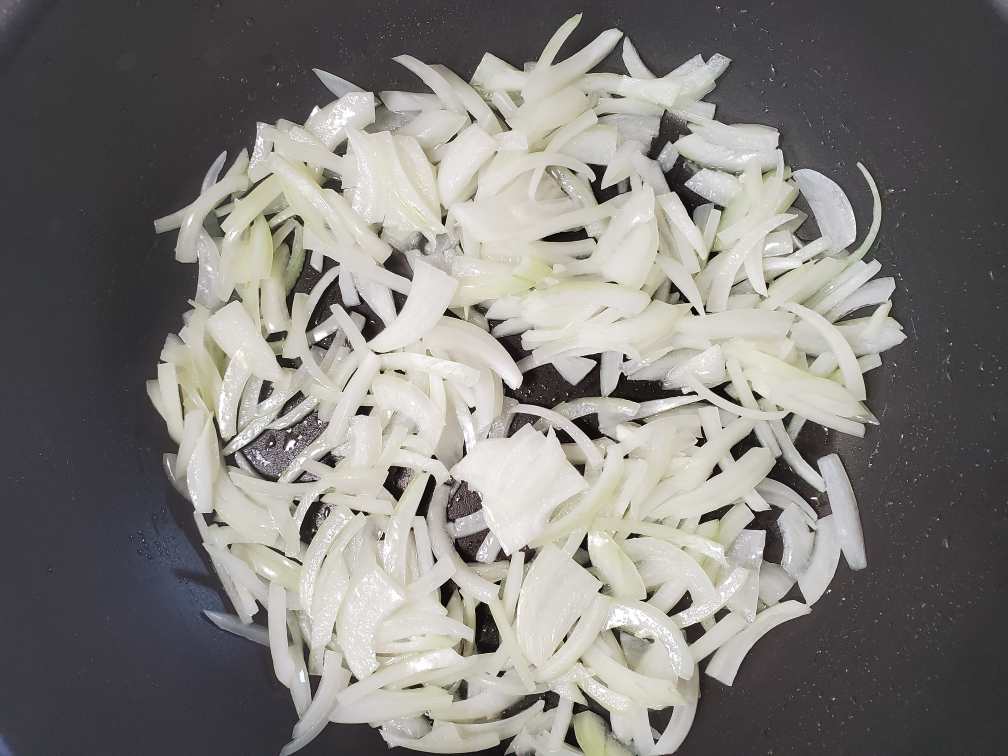
Get a wide pot and add ghee and oil to heat up. Add your thinly sliced onion and fry them until they are brown, on medium heat. Mix time to time to ensure even frying. Do not wait until the onions burn which can make the curry bitter.
-
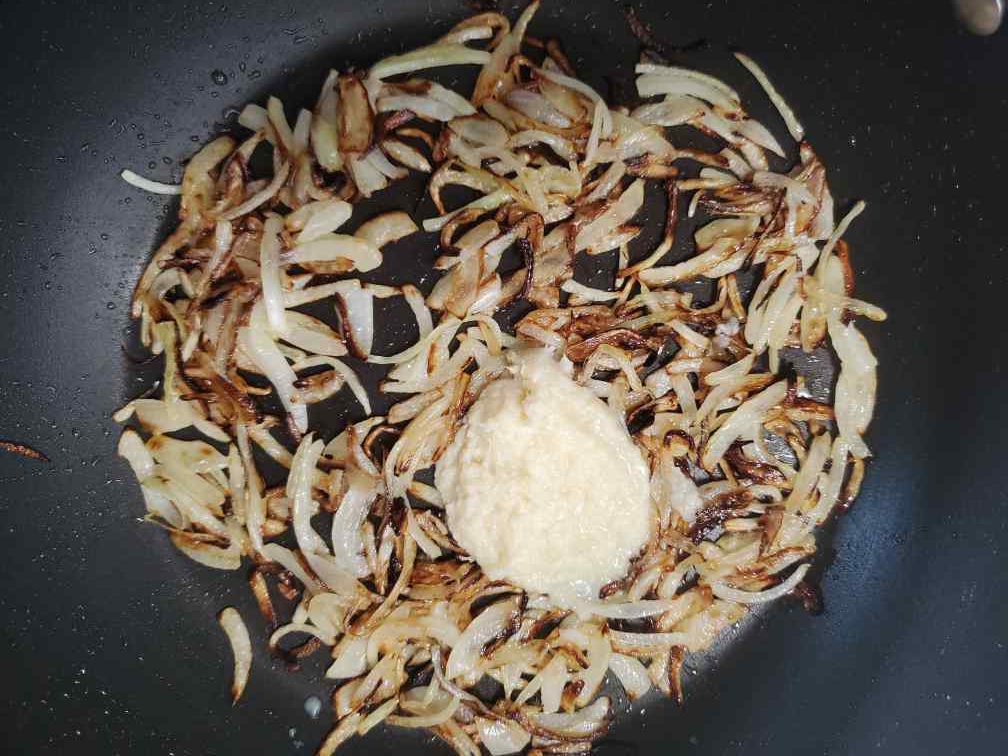
When onions are brown, add ginger garlic paste and mix well together. Lower the heat and cover if it splatters. Fry until the raw smell goes away.
-
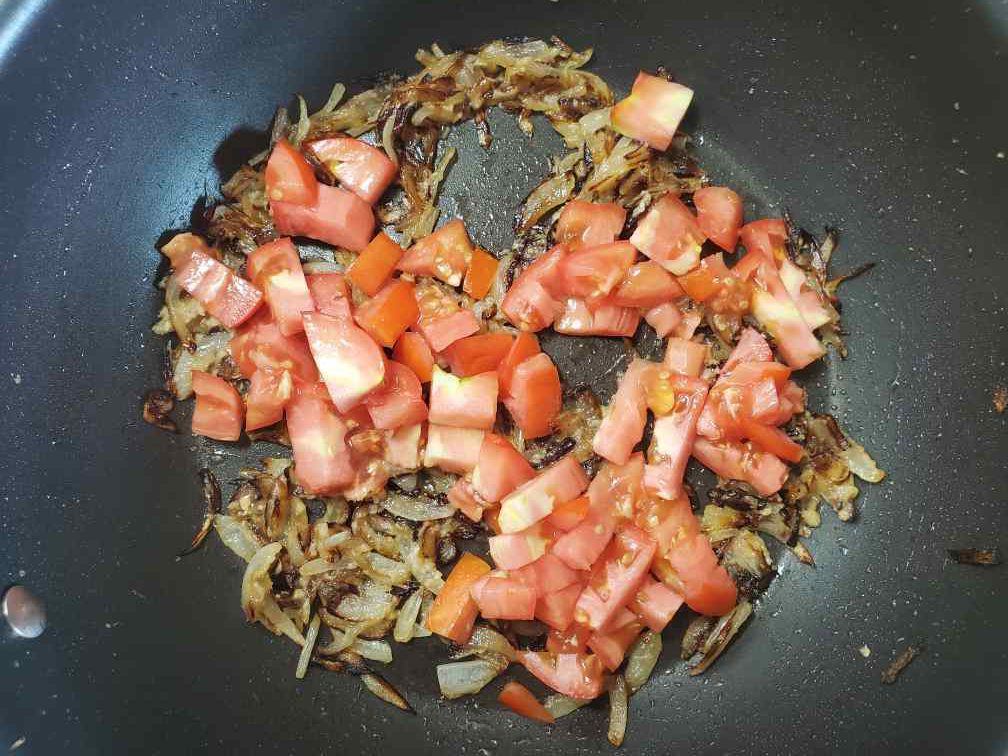
Now add your diced tomatoes. Mix well together.
-
Cook the tomatoes until they're very mushy. Use the back of the spoon to mash them a little bit.

-
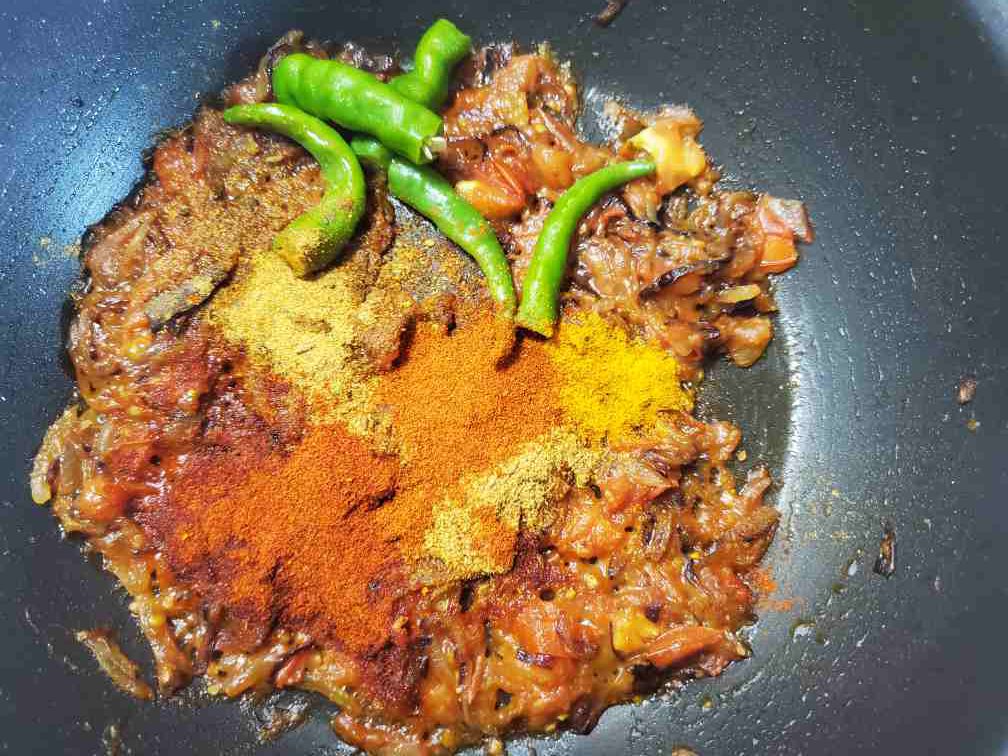
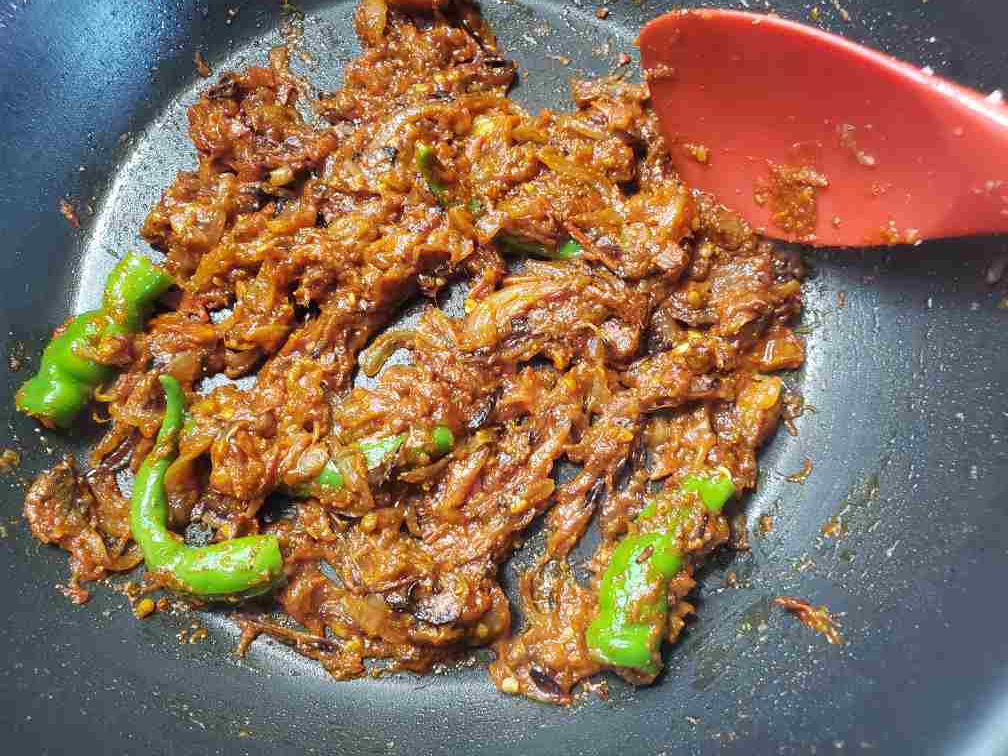
To that, add biryani masala powder, Kashmiri red chili powder, cayenne powder, turmeric powder, salt, and green chilies broken into big pieces.
-
Toast the spices with onions for about a minute in low heat.
-
Now add the chicken pieces and mix well together. Let the chicken pieces sear a bit.
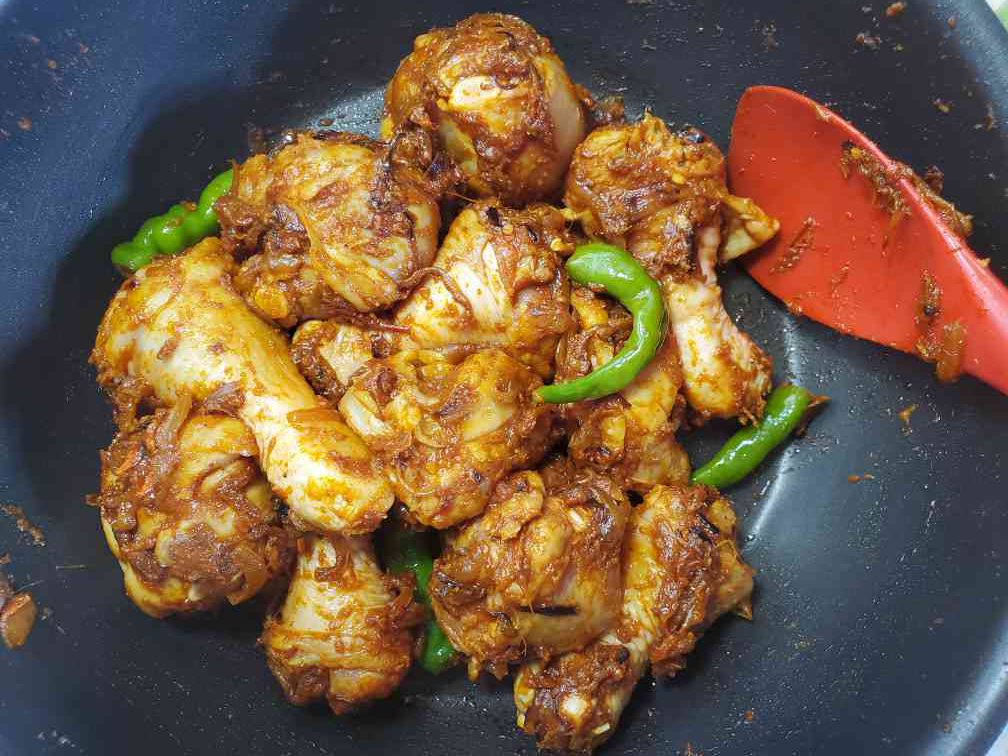
-
Turn off the heat and add your yogurt. Make sure to beat the yogurt with a spoon to break the lumps and to make it smooth.
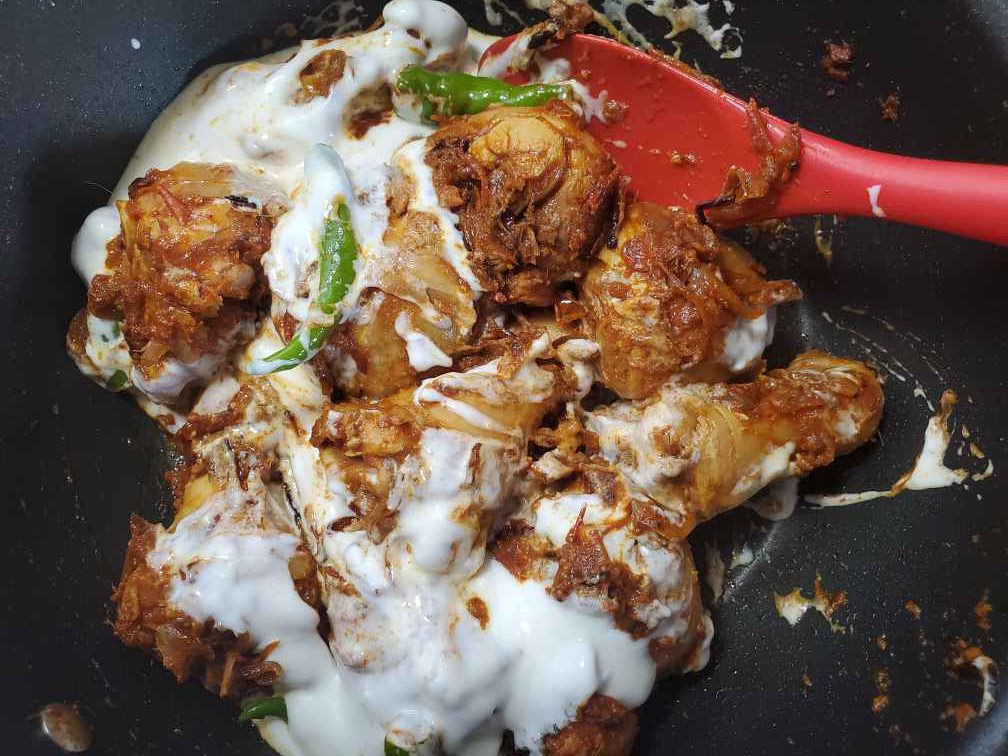
-
Mix well with the chicken, turn on the heat to medium-low and add 1/4 cup of water and mix.
-
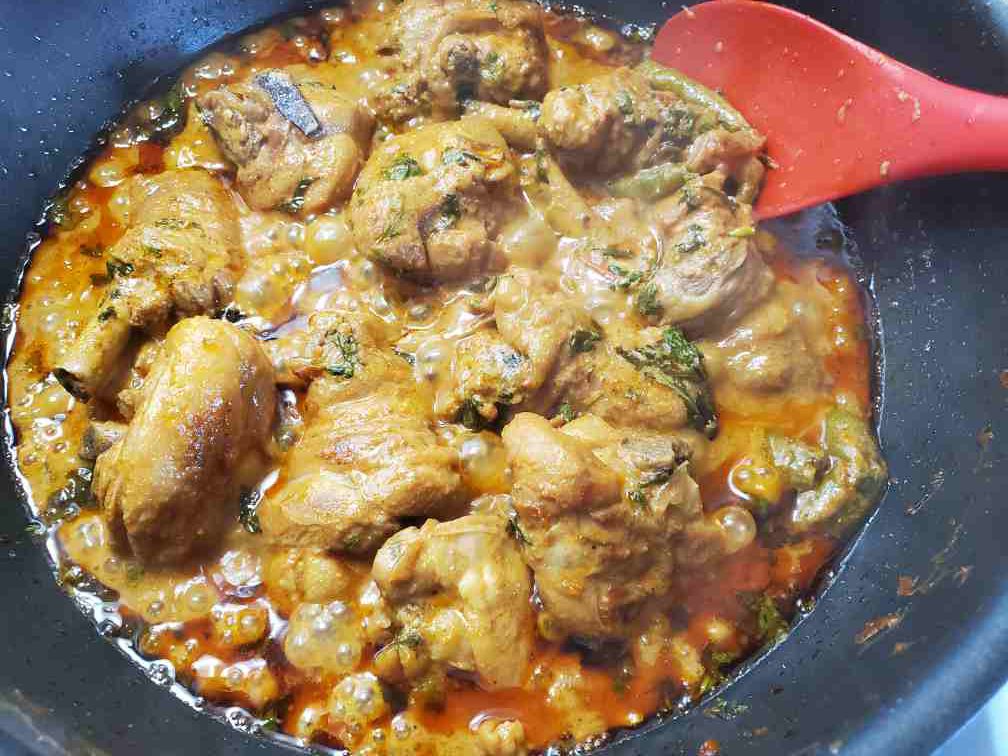
Cover it and cook it until the oil separates from the curry. (While the chicken is cooking, you can also start washing and soaking the rice. Check the instructions on the next section)

-
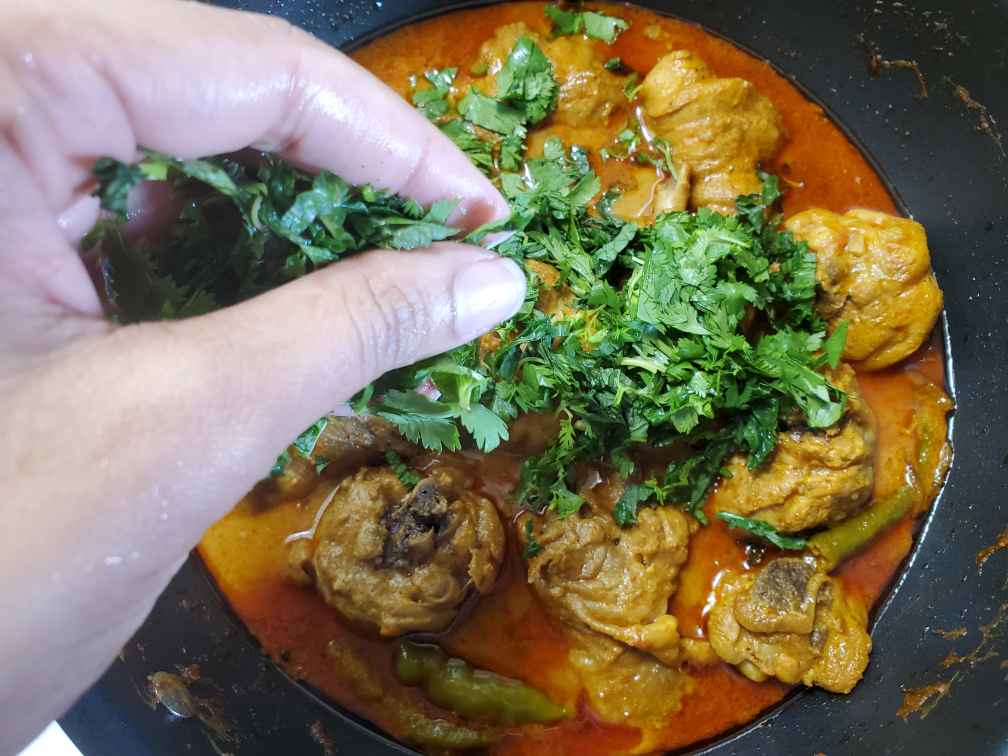
When the oil has separated in the curry, add cilantro, and mint leaves. Mix and cook for another few minutes.
-
After a few minutes, taste the gravy and see if it has enough salt. Adjust salt if needed.
-
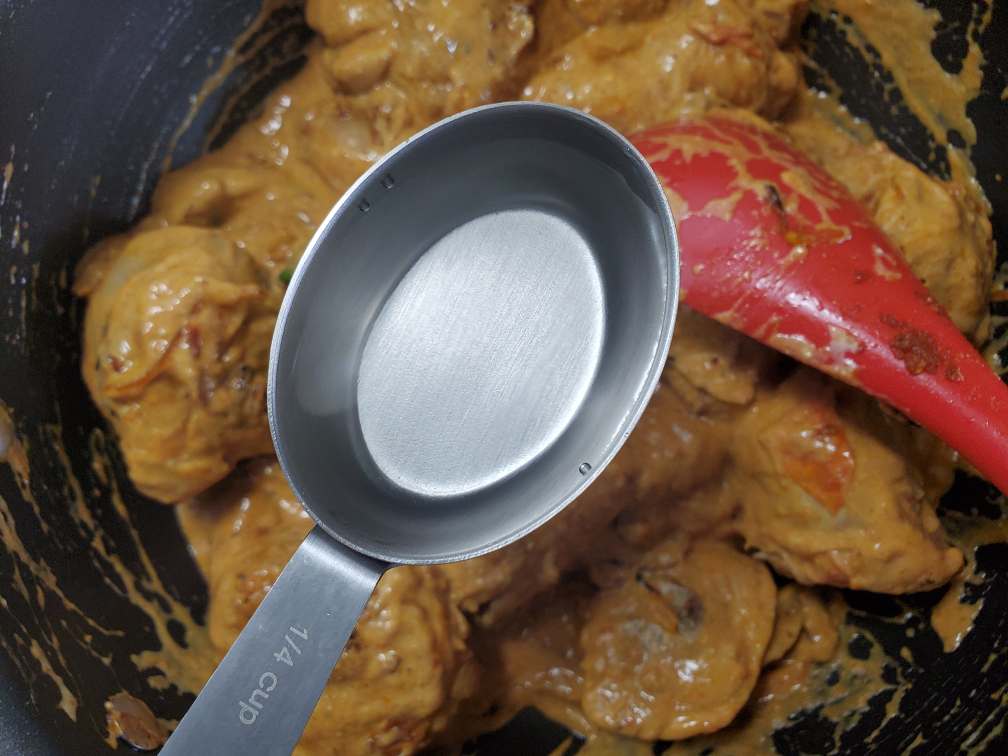
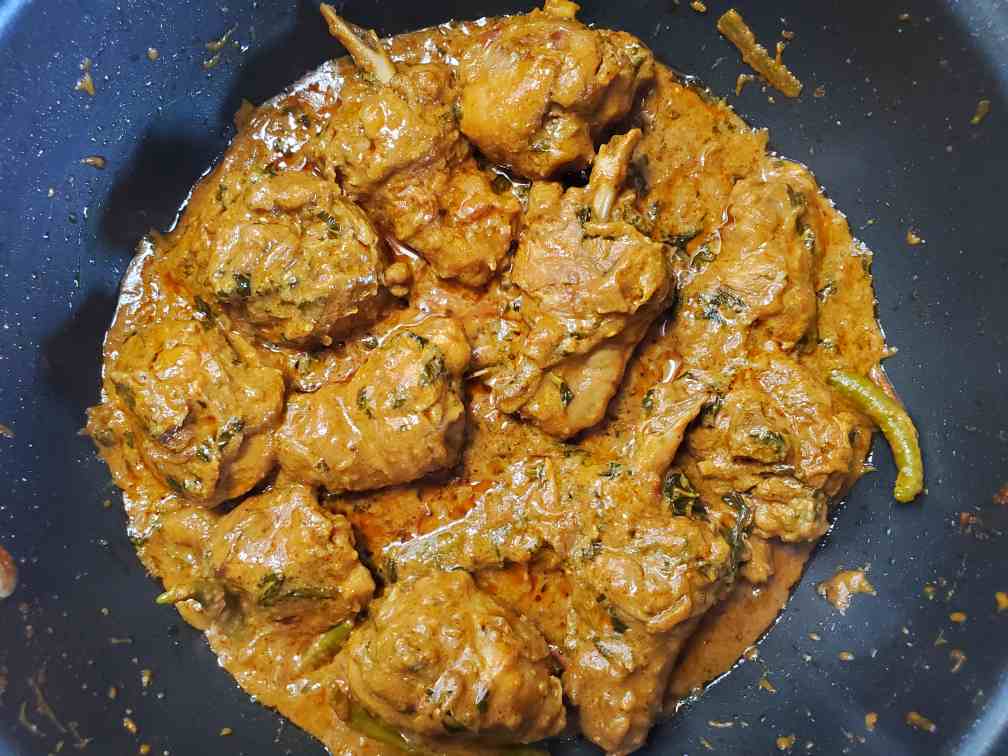
Cover again and cook on medium-low heat until there's very little gravy left. (about 1/4 cup)
-
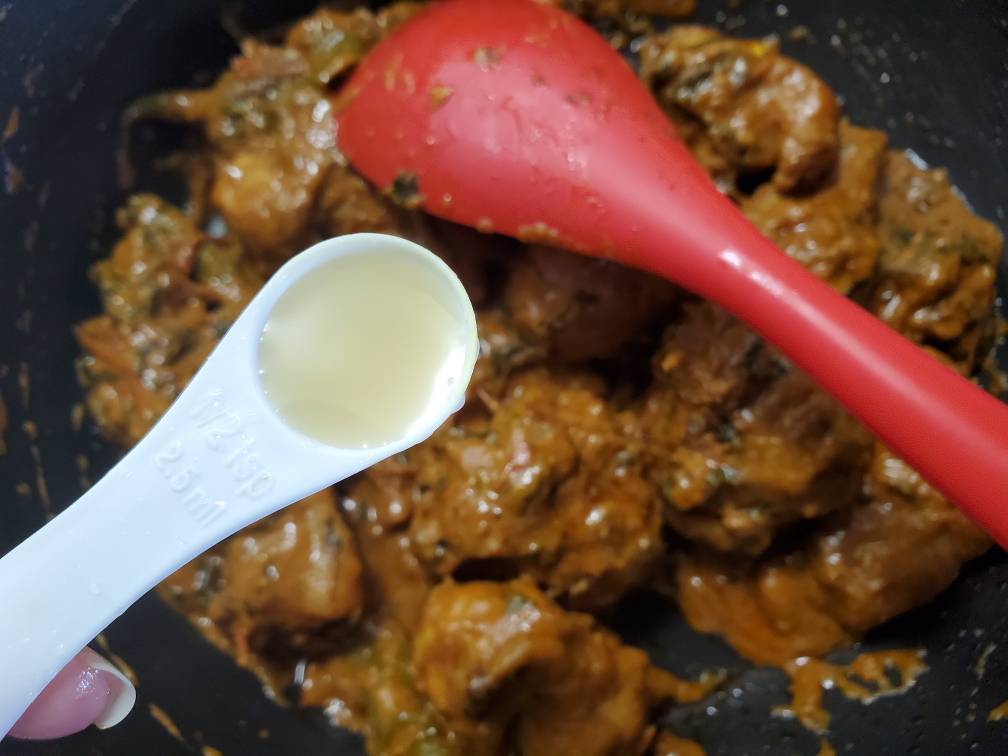
When the curry is done, turn off the heat and add 1/2 tsp of lime juice and mix well. If the curry is already sour enough for you with the yogurt then you can skip adding lime.
Making rice
-
Meanwhile, you make the chicken, wash your Basmati rice thoroughly until the water runs clear. Then soak the rice in water for about 15mins.
-
Heat about 2.5l of water in a large pot. To that add cumin seeds, cloves, cardamom, cinnamon, bay leaves, ghee, and salt. Taste the water. It should taste pretty salty. Otherwise, your rice will end up bland. Let the water come to boil.
-
Add the rice and cook it until they're almost done (about 90%). To test that take a few rice grains out and taste. The rice grains have to be cooked all the way through but they have to be firm when you bite.

-
When the rice is 90% done, immediately drain the rice using a colander. Spread the rice in the colander so the steam can escape and it would slow down further cooking.
-
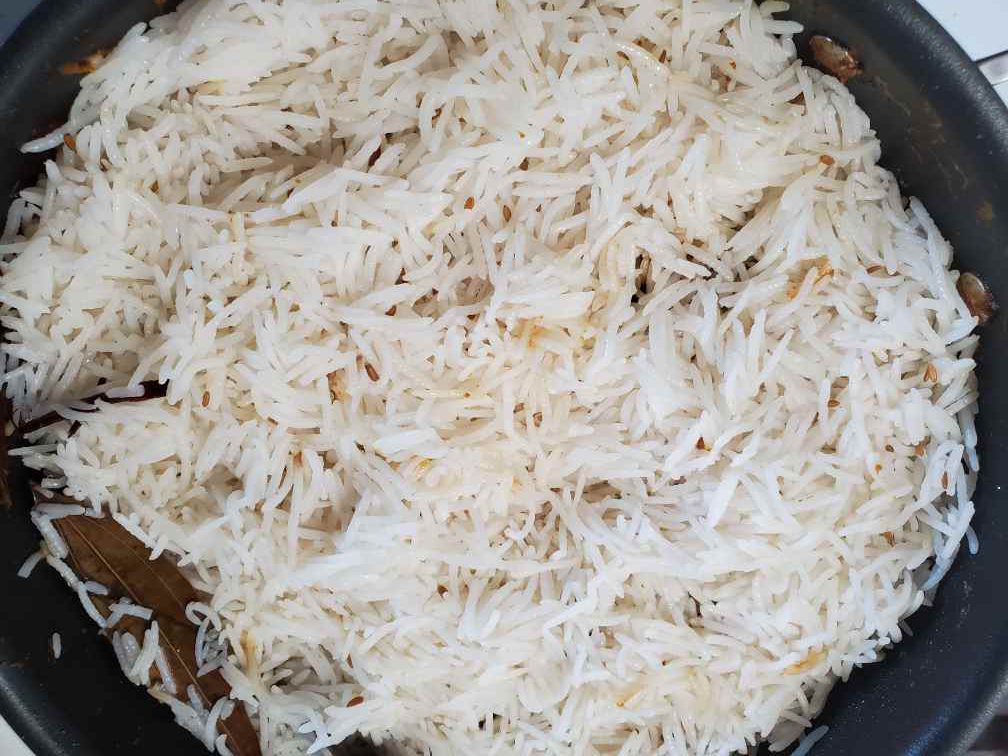
Now layer the rice on top of the chicken you made earlier. Do not press the rice with the spoon. The grains have to be nice and loose.
-
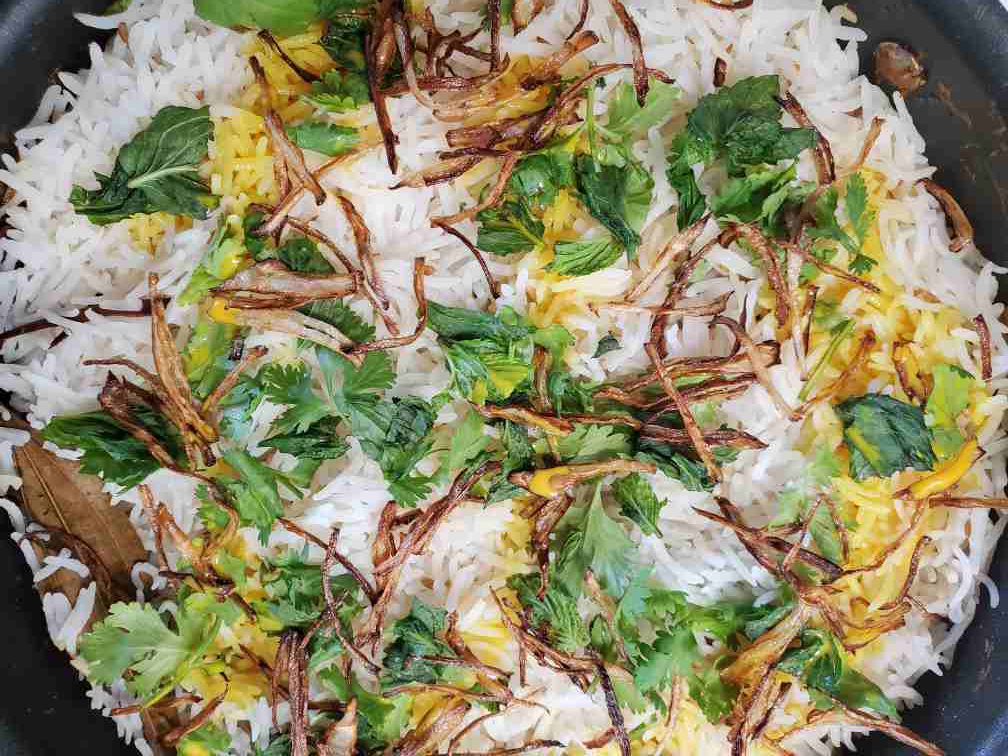
Mix milk and yellow food color in a small bowl. And pour the yellow milk around the layered rice. Also, add ghee, some of your fried onion, some of the cilantro, and mint leaves on the top of the rice.
-
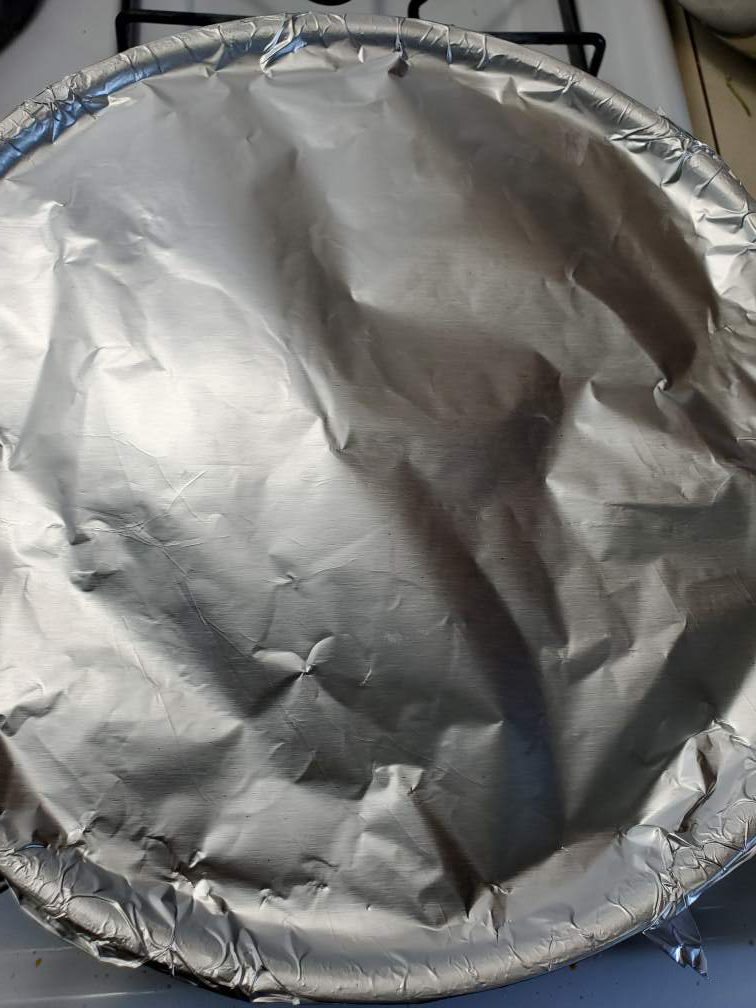
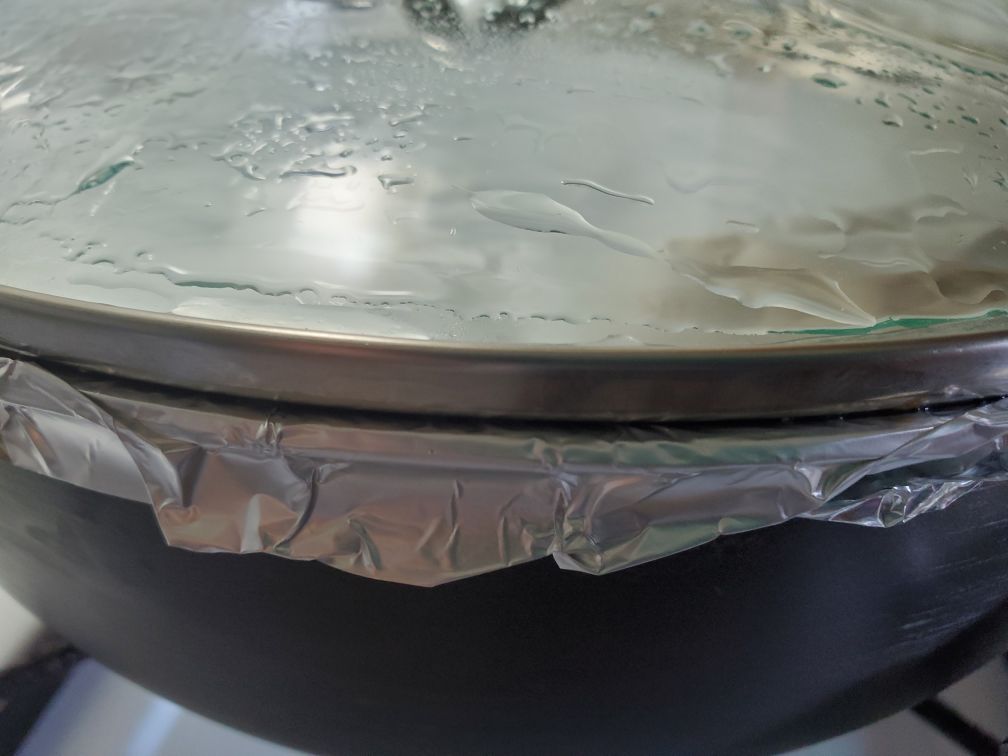
Cover your pot tightly with an aluminum foil and close with a tight-fitting lid to stop steam from leaking.
-
Cook for about 4 mins on medium-high heat. Then set the flame/heat to the lowest setting and cook for another 15 mins. Turn off the heat and leave for another 15mins before you open it.
-
Serve without over mixing the rice with chicken. Garnish with rest of the fried onion, cilantro, and mint. Serve with boiled eggs, yogurt or raita.

Leave a Comment